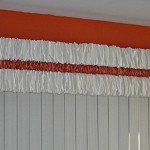
A rod pocket (also called a casing) is an easy window treatment, ideal for that beginner; a project for someone with a modest amount of sewing skills.
Turning the top of the curtain fabric down twice and then stitching it along the bottom fold create it. The top hems are open at both ends so a curtain rod or pole can be inserted. This is the most common way to hang curtains, café curtains and valances.
A rod pocket can lay flush against the rod, or it can have a ruffle, typically 2 to 4 inches deep.
The curtains may be either unlined or lined. Sheers and other unlined curtains are more light and airy than curtains that are lined. However, lining adds extra body to curtains, giving them the look and drape of custom window treatments. A heading is the portion at the top of a rod pocket curtain that forms a ruffle when the curtain is on the rod. The width of the heading is the distance from the top of the finished curtain to the top of the stitching line of the rod pocket.
Before you begin to sew, decide where you want the window treatment to be, and install the rod. Measure from the top of the rod to where you want the lower edge of the curtain. This is what the finished length of the curtain will measure.
Trim off all the selvages from the fabric panels before you begin, as these tend to shrink and distort your finished project. The fabric for your curtain should measure two and a half to three times the desired finished width You may need to sew more than one width of fabric together depending on the size of your window.
Add 14 inches to the finished length of your curtain for the hem and the rod pocket.
We are going to use a 4 inch double-fold hem which is often used for decorator fabrics and for this practice example we are using a 3 inch double-fold heading for the rod pocket. When making your own curtains the rod pocket must be large enough to accommodate the rod or pole comfortably and to allow the curtain to gather on the rod.
First mark and cut out the fabric. If there’s more than one width, lay them together, right sides facing, pin them in place and join them using straight stitches. Press the seams open. For a well tailored look, your curtain should have neat, even hems. Pressing is an important step. Turn under 4 inches along the bottom, press, then 4 more inches for a double hem. Press and then sew along the second folded edge. Turn under 1.5 inches along both sides, press, then 1.5 more inches for a double side hem. Press and then sew along the folded edges.
To finish the upper edge of the curtain, turn under 3 inches along the top, press, then 3 more inches for a double heading allowance. Press again and then sew along the folded edge.
Now all you have to do is insert the curtain rod into the top pocket and gather.
A heading is the portion at the top of a rod pocket curtain that forms a ruffle when the curtain is on the rod. The width of the heading is the distance from the top of the finished curtain to the top of the stitching line of the rod pocket.


by Susan Dorbeck